

Free Shipping
40 €
Lip gloss
60 €
Mascara
75 €
Knowing how to use concealer helps you cover what still shows through foundation: dark circles, redness, blemishes and pigmentation marks. It looks best applied sparingly and precisely, while a thick layer or the wrong shade can emphasise fine lines and leave pale half-moons under the eyes. In this guide you will learn how to apply concealer step by step: how to choose the shade, what order to apply it in and which mistakes to avoid.
Concealers vary in texture and coverage, but they are usually more pigmented than foundation and are used to target specific areas: dark circles under the eyes, redness around the nose, blemishes and pigmentation marks. Foundation evens out the tone of the whole face in a thin layer, while concealer works on the spot and covers whatever still shows through.
People often ask whether face concealer and under-eye concealer are different products. Sometimes they are: under-eye formulas tend to be more flexible and creamy, while those for blemishes are thicker and drier. Many liquid concealers, however, are multi-purpose: if the texture is light and the shade is right, you can use the same product under the eyes and on the face.
The biggest difference is quantity. You use a few drops of foundation for the whole face, but with concealer you start with one or two tiny dots per eye and add more only if needed. If you applied concealer like foundation, your face would look heavy and mask-like.
The right concealer shade depends on what you are hiding: under the eyes, close to your skin tone or very slightly lighter; on blemishes and marks, an exact match.
For the under-eye area, start with a concealer close to your skin tone. If you want a little brightening, you can try one a touch lighter, but a shade that is too pale can draw attention to the darkness or leave a visible edge. On a blemish, a lighter shade only highlights the bump, because a light spot catches the eye.
| What you are covering | Which shade | Why |
|---|---|---|
| Dark circles under the eyes | Close to your skin tone or very slightly lighter | Gently brightens the area; too pale a shade would emphasise the darkness and leave an edge |
| Blemishes, pigmentation marks | An exact match for your skin tone | Blends into the surrounding skin and does not highlight the bump |
| Redness around the nose and on the cheeks | Your skin tone, with a neutral or warm (yellow) undertone | A pink undertone would only intensify the redness |
| Bluish or purple circles | A warmer concealer; for very strong circles, a peach corrector underneath | A warm tone softens the blue, so the under-eyes don’t look grey |
When dark circles are bluish or purple rather than brown, a light concealer on its own often looks greyish over them. In that case a colour corrector is sometimes used: peach for fair skin, orange for deeper skin. A thin layer neutralises the blue, and concealer goes on top. For most people one well-chosen concealer is enough day to day, so a corrector is only worth trying if your circles are very noticeable.
Undertone matters too. If your skin has a pink or neutral undertone, a neutral concealer will suit you better; if it is yellow or golden, go for a warm one.
Check the shade in daylight and on the area where you will use it: under-eye concealer under the eye, concealer for marks on the cheek or along the jawline. The skin on your wrist is often a different tone, so testing on your hand is misleading.
In most cases concealer goes on after foundation. Foundation already evens out most of the unevenness, so you need less concealer, and you won’t wipe it away while applying your base.
The order depends on what you use:
If you are still choosing a base, first read how to choose foundation for your skin type – it determines how much concealer you will need in the first place.
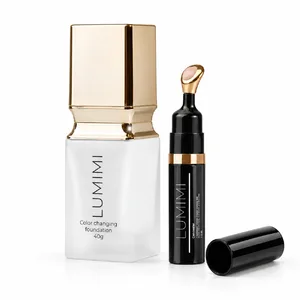
LUMIMI
Colour-changing foundation + Universal concealer
The foundation releases its pigment as you blend and is made for fair and medium skin tones, while the concealer covers whatever the foundation hasn’t hidden. Best suited to lighter skin.
See the foundation and concealer setNot always. If your skin is dry or more mature, powder under the eyes can emphasise fine lines, so it is often better to skip it or use very little. If your skin is oily or the concealer creases during the day, set it with a very thin layer of loose powder.
Before powdering, gently tap the concealer once more with your fingertip and smile into the mirror: if lines have formed in the creases, smooth them out now, because powder would lock them in. Press powder on with a small soft brush or a sponge rather than sweeping it. You will find which tools to choose in our article on makeup brushes.
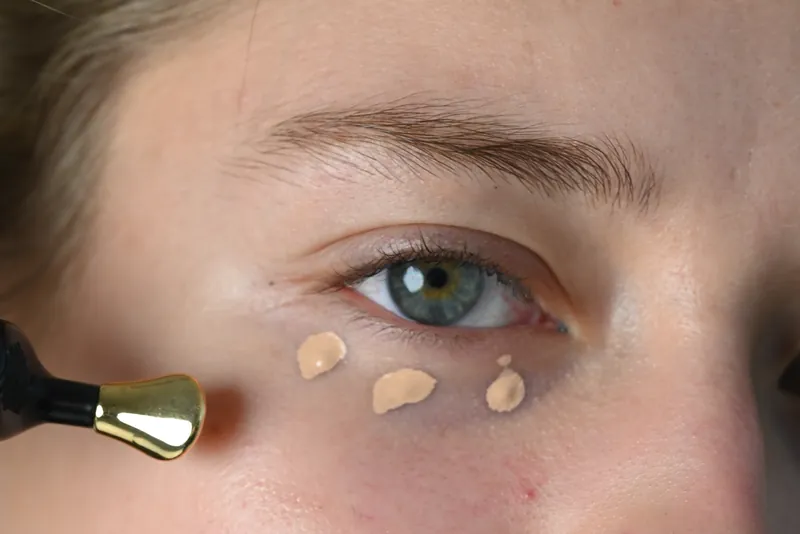
Under-eye concealer is applied in a few dots and tapped in, not rubbed – this keeps the layer thin and less likely to crease. The skin under the eyes is thinner and moves more than the rest of the face, so “less is more” really applies here.
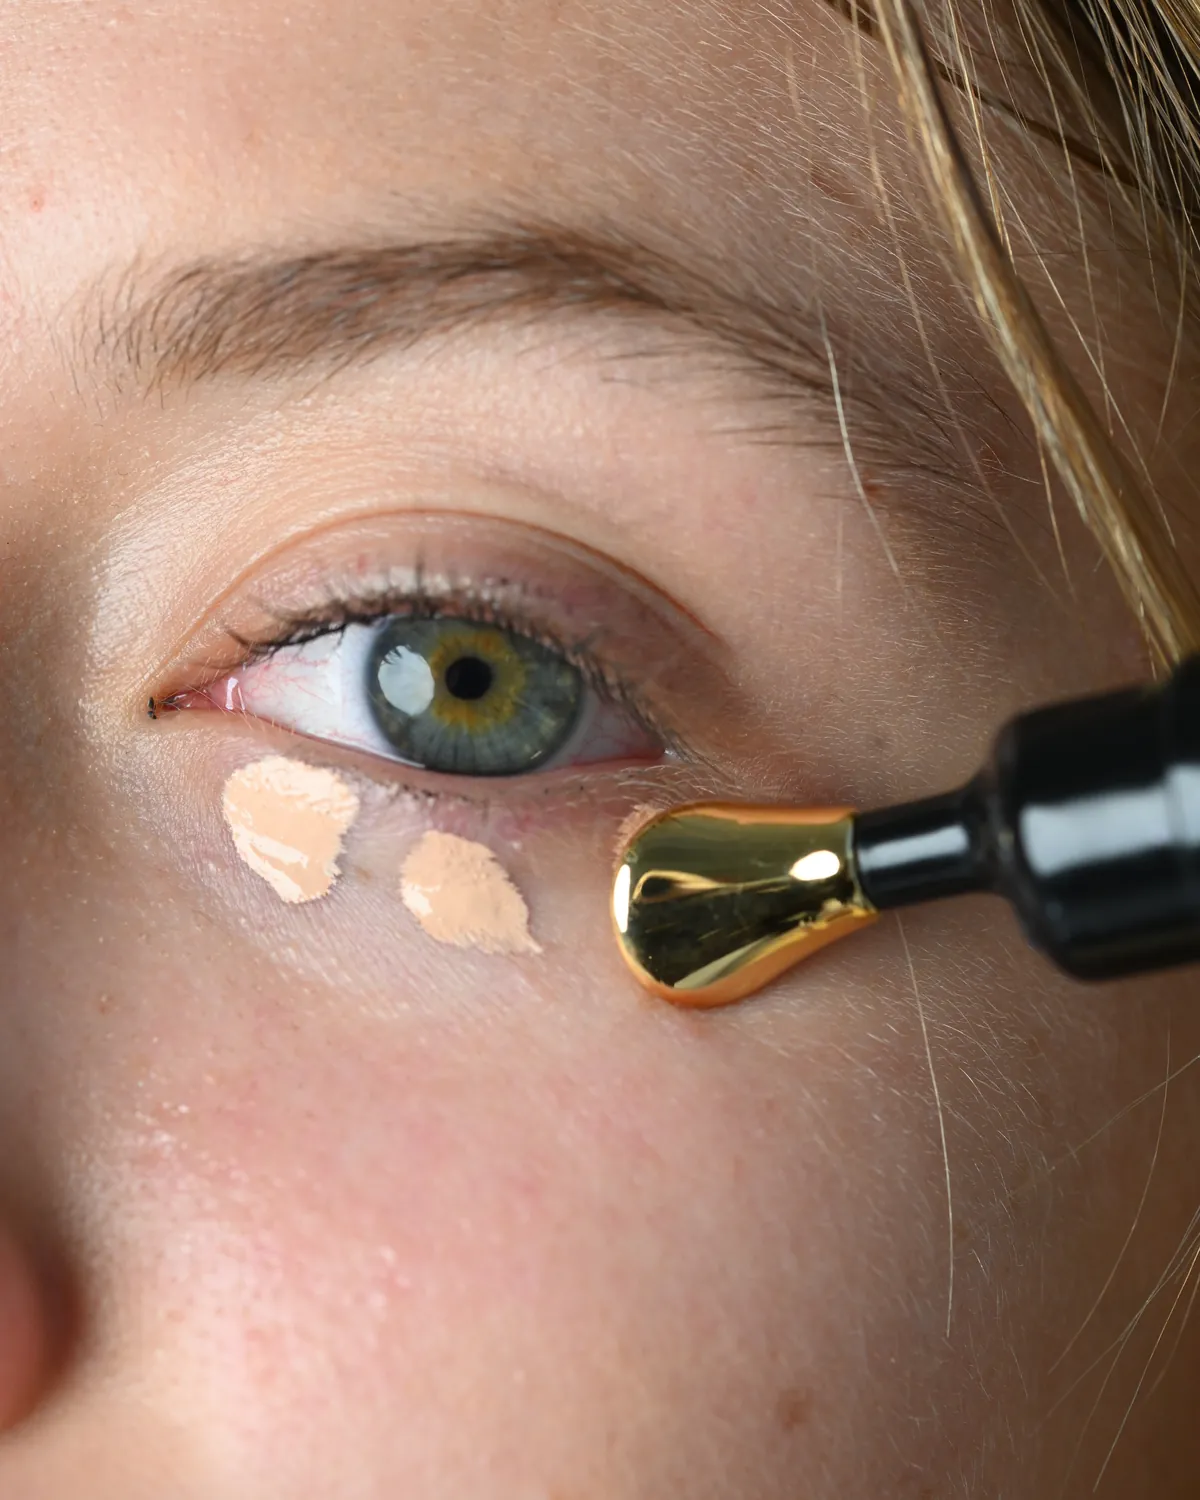
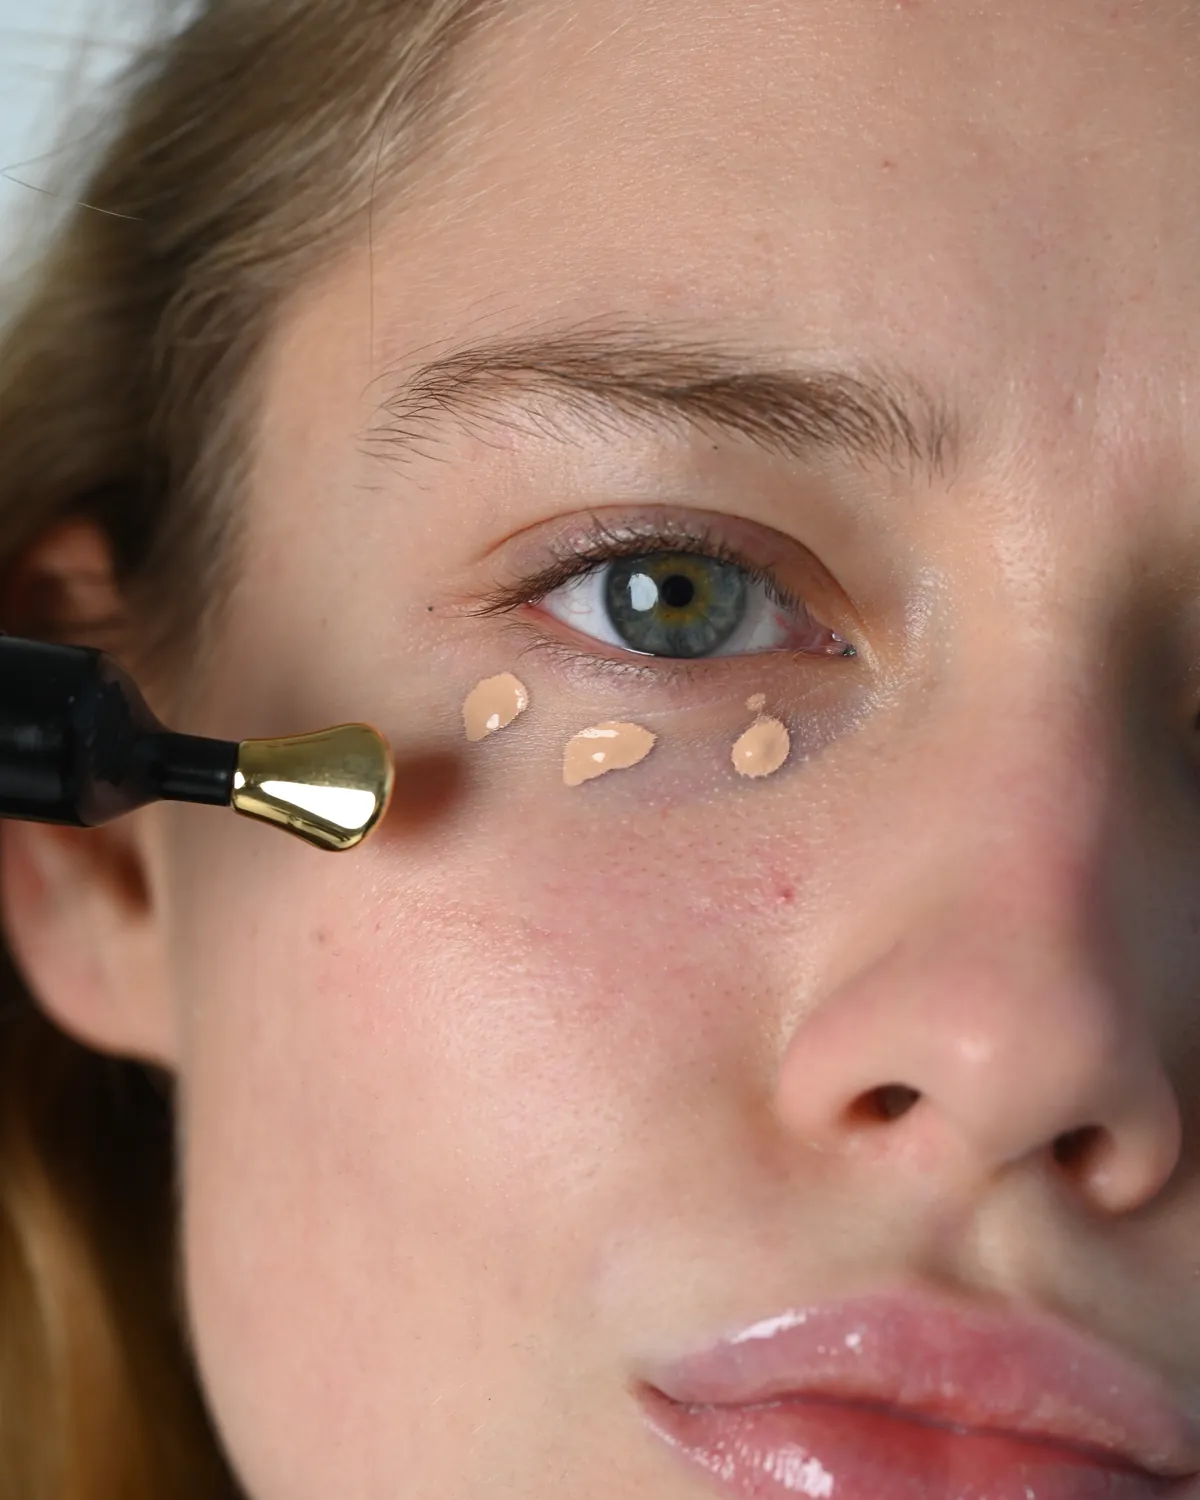
A large, bright triangle under the eye looks good in photos or on stage, but for everyday wear it is often too heavy. For daily makeup, dots where it is genuinely dark are all you need.
For redness and blemishes you need very little concealer – just enough to cover the colour. What matters most here is an exact shade match and well-blended edges.
Apply your foundation first and check how much redness is left – often less than it seemed. Cover what remains in spots: place a few small dots around the sides of the nose or on the cheek, then tap with a sponge, blending the edges into your foundation. Larger areas are better covered with two thin layers than one thick one.

For a blemish or pigmentation mark, choose a concealer that matches your skin tone exactly. Remember: concealer hides colour, not texture, so a lighter shade would only make a spot stand out.
Hygiene is especially important here. Avoid touching blemishes or inflamed skin with the applicator: squeeze a small amount onto a clean palette or the back of your hand instead, pick it up with a clean brush and wash the brush regularly.
Don’t apply concealer to broken or damaged skin. If you have a skin condition, a rash or inflammation, ask your doctor about skincare and makeup. If your skin is sensitive, try a new product on a small area first.
Most problems come not from the product itself but from the amount, the shade and how the skin is prepped.
Judge it not by the brand or the packaging but by the shade, the coverage and how it looks after a few hours. A normal day wearing your usual makeup tells you far more than a swatch on your hand.
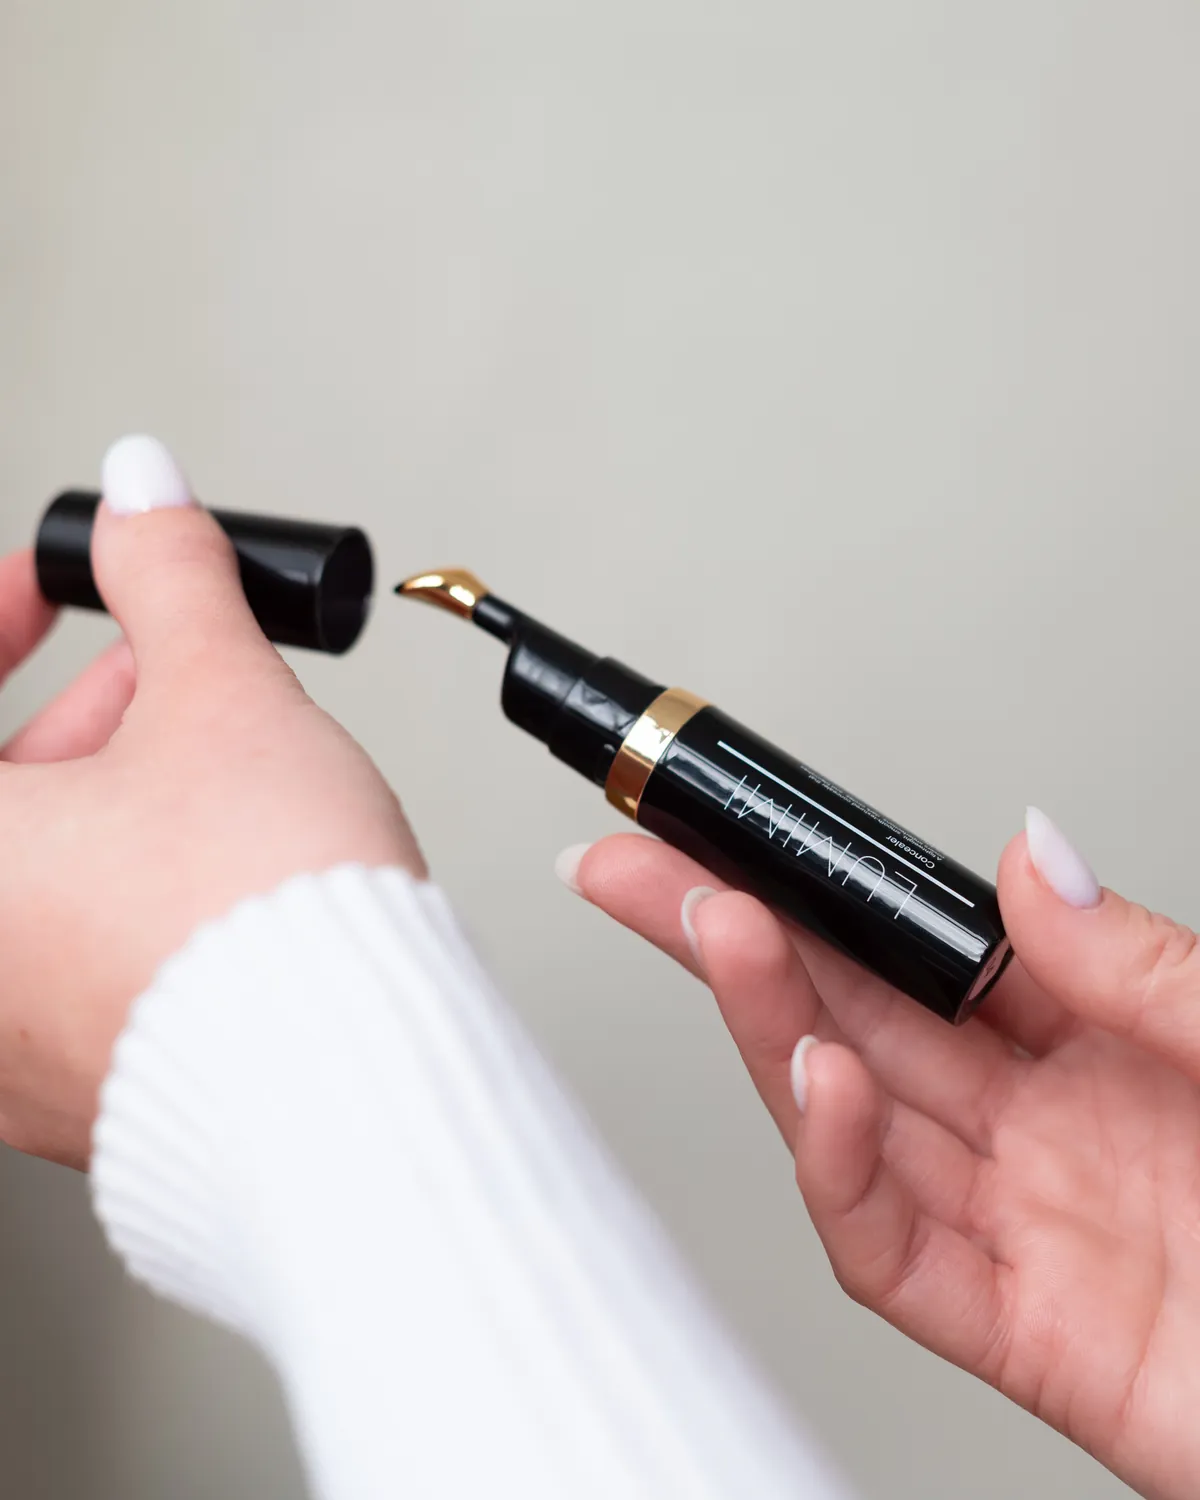
The LUMIMI Universal Concealer for the Face and Under-Eye Area comes in a 7.5 ml bottle with a dispenser and a gold-tipped applicator that makes placing dots easy. It is highly pigmented, so start with a tiny amount and build up only where needed. It contains squalane, olive oil, jojoba oil and vitamin E, and it is free from fragrance and alcohol.
LUMIMI concealer comes in two light shades, Nude Beige and Warm Ivory, so it is best suited to lighter skin. Nude Beige has a more neutral look, while Warm Ivory is warmer and can also help soften bluish under-eye circles. Compare both against your own skin in daylight rather than choosing by undertone alone. If your skin is medium or deeper, look for a concealer with a wider shade range.
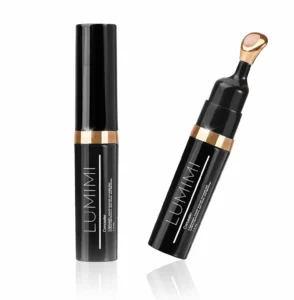
LUMIMI
Universal Concealer for the Face and Under-Eye Area
Highly pigmented, with a dispenser and applicator – for under-eyes, redness and marks. Two light shades for lighter skin.
See both concealer shadesIn everyday speech the words are often used interchangeably. Strictly speaking, concealer is skin-toned and covers unevenness, while a colour corrector (peach, green) neutralises a specific tone and goes on underneath concealer.
On the spot, yes: if your skin is fairly even, concealer under the eyes and on the odd mark is enough. For the whole face it is usually too pigmented, so your face would look mask-like and it would be hard to spread evenly.
The most common reasons are too much product, unmoisturised skin or an overly rich eye cream. Use less, tap rather than rub, and smooth out any lines with your finger before powdering.
Yes, as long as the skin isn’t broken. Pick up the product with a clean brush or fingertip rather than straight from the applicator, apply a thin layer and blend only the edges.
Fingers are easiest for the under-eye area: their warmth helps the texture melt into the skin. A damp sponge gives the thinnest, most natural layer, while a small pointed brush is the most precise for blemishes and marks.
First, use less: a dry area needs only the thinnest layer, tapped in. Then change your prep – a few minutes before makeup, apply an eye cream with hydrating ingredients and let it absorb, and skip powder on dry areas or use very little.